| Yesterday, as I was constructing a cake for a Not-60th Birthday, I realized something. In my past posts about creating cakes, I very quickly jotted down statements like "Put your cake together." Well, if everyone knew how to just "put a cake together," bakeries across the country would be closing down! So, at the risk of closing my bakery before it even has a change to open, I am going to teach you all How to Build A Cake The following is a relatively simply 2-layer cake. Once you master this bit, adding on 3rd and 4th layers will come super easily! So let's start here. First and foremost, you need to pick a good cake recipe. Many bakers will tell you that you need a dense cake. I do not believe this is the case; what you need is a cake that can support itself and some added weight. So, if your cake crumbles when you touch it - it's no good. When the time comes that you want to create a multi-tier wedding-style cake, a denser cake would be preferable. But for a simple 2-layer cake, I like to use my moist and relatively light Chocolate Cake (*recipe to follow). Another tip many bakers hear is that you should chill/freeze your cake before decorating. I don't think this is the case so long as you have a cake that is easy to slice through without falling apart. If, however, you are worried about cutting straight edges, then pop that sucker in the freezer for an hour or two! I won't judge. So Step 1, bake your cakes. So far so good? Great. Step 2, level your cakes.  Using a bread knife, begin cutting where your cake begins to form a dome. I once heard Martha Stewart say that "to cut a straight line, just think straight." It's a weird statement, but it sort of works. If it is not perfect, do not fret. That is what fillings are for. Step 3, fill your cake. 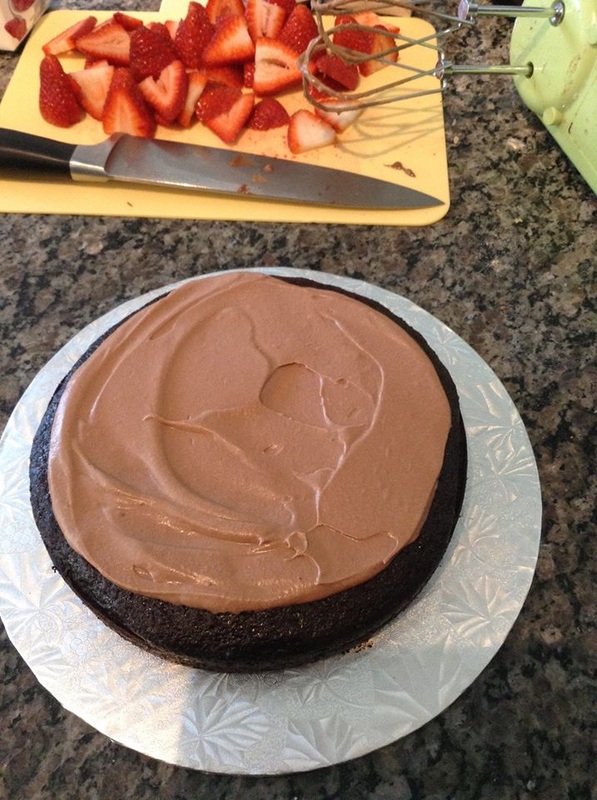 You can fill a cake with whatever you'd like; jam, frosting, ganache, fresh fruit. I opted for a whipped Nutella ganache and fresh strawberries. Note that the strawberries do not go all the way to the edge. When using fruits or preserves, create a border with your frosting that will be going on the outside of the cake. This prevents juices or unwanted colours from leaking out the sides of the cake. Top this with layer with your second [cooled] cake. at this point, I like to chill my cake for about 20 minutes in the freezer. 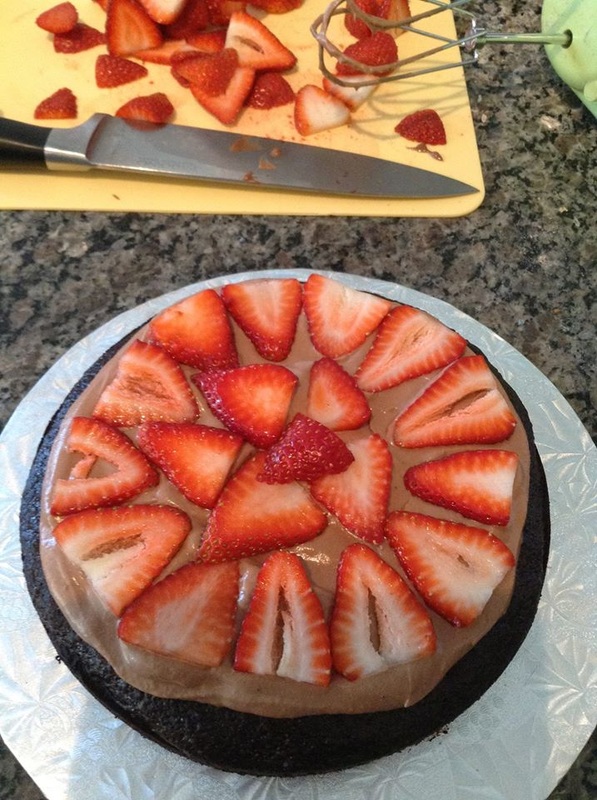 Step 3, dirty ice your cake. I'm sure you have heard this term a lot if you are like me and loving cake-decorating shows. You may have also heard the term crumb coat. Either way, it keeps your cake from becoming a hot mess. By putting a thin layer of frosting/ganache on your entire cake, you are filling in indentations (notice that there is a thick layer of ganache in the middle of my cake? That is filling in where the strawberries lifted the second layer a bit) and capturing loose crumbs so they do not get in your final layer of frosting or fondant. Chill your cake again for at least 20 minutes. 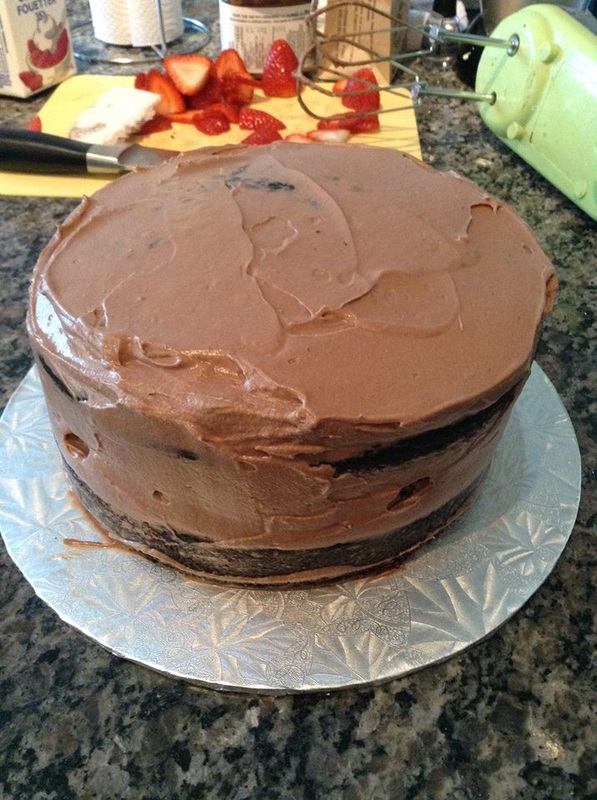 Step 4, using an offset spatula (or a butter knife in a pinch), spread on the rest of your frosting/ganache. The best way to do this is to put a huge dallop of frosting on the top of your cake, and then bring it down the sides of your cake. If you are like me, you will inevitably get frosting all over your cake board. Just tidy it up with a wet towel - no big deal. 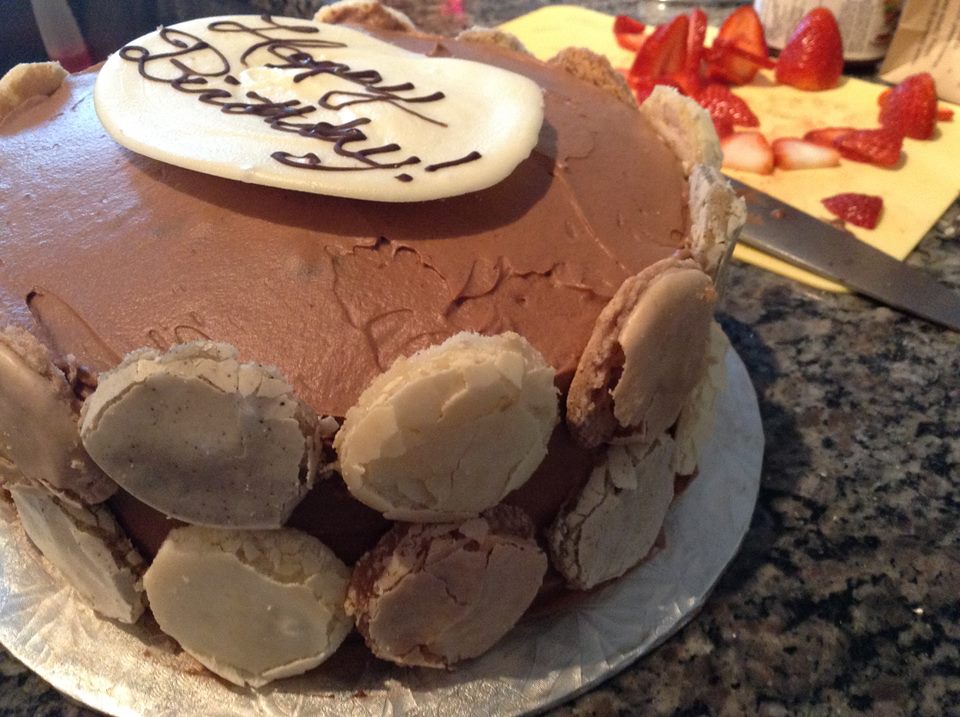 Now you can leave your cake frosted, create patterns with your spatula, or decorate with yummy goodies! I created a pattern with almond, mocha, and chocolate macarons, and then topped the entire thing with a chocolate "Happy Birthday!" (To make this, simply melt some white chocolate, and pour it onto a piece of wax paper. Once it is set, pipe on your message. It should pop right off the wax paper once cooled). 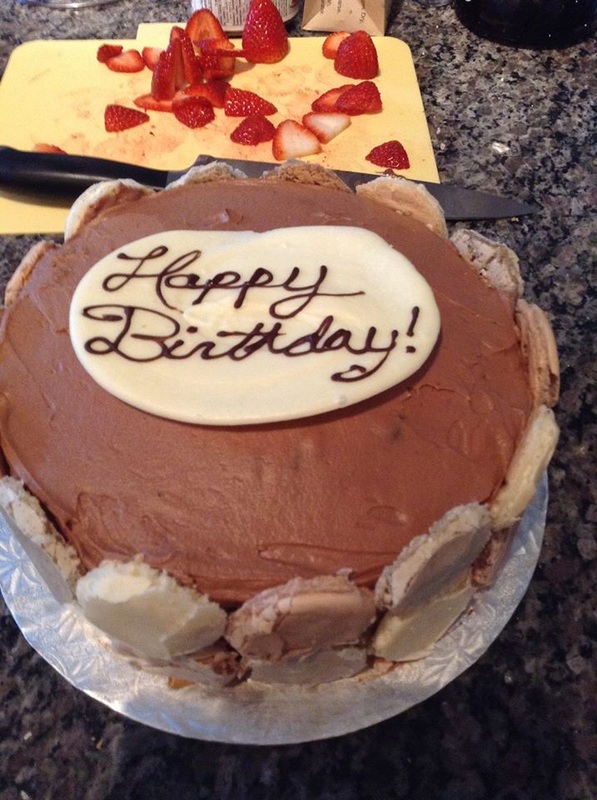 See? So easy! And even easier than the above steps is my 10 minute Chocolate Cake Recipe. Here is what you need Ingredients - 2 cups sugar - 1 3/4 cups all-purpose flour - 3/4 cups cocoa - 2 tsp baking soda - 1 tsp baking powder - 1/2 tsp kosher salt - 1/2 cup vegetable oil - 1 cup strong black coffee* - 1 cup buttermilk ** - 2 tsp vanilla extract * Always replace the water in chocolate cake recipes with coffee; it brings out the chocolate notes. ** Acidic buttermilk, when mixed with baking soda, creates a chemical reaction resulting in a fluffy, moist cake. If you do not know buttermilk handy, combine 1 cup milk with 1 tbsp lemon juice or white vinegar. Combine all of your dry ingredients. Combine all of your wet ingredients. Combine everything together. Pour into 2 greased 8-inch cake pans (I also coat the pans with some coca powder), and tap out the bubbles. Bake at 350 F for 35 minutes, turning the pans half way through bake time. Cool completely, and decorate! |
 RSS Feed